The bathroom has evolved into a sanctuary, a space for relaxation and rejuvenation. In 2025, the trend of blending traditional elements with modern functionality continues to dominate bathroom design. Porcelain tile, known for its durability, versatility, and aesthetic appeal, remains a top choice for creating a timeless yet contemporary bathroom. Coupled with a sleek glass shower door, porcelain tile can elevate the overall ambiance of your traditional-style bathroom. This guide provides a step-by-step approach to installing porcelain tile in your bathroom, focusing on achieving a professional and long-lasting result.
I. Planning and Preparation: The Foundation of Success
A. Design Considerations:
VIEW PRODUCT ADD TO CARTColor Palette: For a traditional bathroom in 2025, consider a color palette that evokes a sense of calm and elegance. Whites, creams, soft grays, and muted blues are excellent choices. These colors create a serene backdrop that complements traditional fixtures and allows the glass shower door to stand out as a focal point.
Tile Size and Pattern: Larger format tiles (e.g., 12×24 inches or 24×48 inches) are gaining popularity for their ability to minimize grout lines and create a seamless appearance. However, smaller tiles (e.g., subway tiles or mosaic patterns) can also work well in a traditional setting, especially when used as accents or borders. Herringbone, basketweave, and stacked patterns can add visual interest to the floor or walls.
Texture and Finish: Porcelain tiles come in various textures and finishes. Matte finishes offer a slip-resistant surface, making them ideal for bathroom floors. Polished or glossy finishes can add a touch of luxury to the walls, but be mindful of potential slipperiness on the floor. Textured tiles can mimic natural stone or wood, adding depth and character to the space.
Glass Shower Door Integration: Consider the style of your glass shower door when selecting tiles. Frameless glass doors create a clean, minimalist look that pairs well with modern or transitional tile designs. Framed glass doors, often with ornate details, can complement more traditional tile patterns and colors.

:max_bytes(150000):strip_icc()/how-to-install-ceramic-wall-tile-1824817-10-473071b2fef94af381ad02bc4c1ba8a8.jpg)
B. Gathering Materials and Tools:
- Porcelain Tiles: Purchase enough tiles to cover the desired area, plus an extra 10-15% for cuts and breakage.
- Tile Adhesive (Mortar): Choose a high-quality mortar specifically designed for porcelain tiles. Consider a modified thin-set mortar for added flexibility and bonding strength.
- Grout: Select a grout color that complements your tiles. Epoxy grout is highly resistant to stains and water damage, making it a great option for bathrooms.
- Sealer: Apply a sealer to the grout lines to protect them from moisture and stains.
- Backer Board (Cement Board): Install cement board over the subfloor or wall studs to create a stable and waterproof surface for the tiles.
- Moisture Barrier: Apply a waterproofing membrane to the cement board, especially in the shower area, to prevent water penetration.
- Tools:
- Tile saw (wet saw)
- Notched trowel (size depends on tile size)
- Grout float
- Grout sponge
- Level
- Measuring tape
- Pencil
- Bucket
- Mixing drill with paddle attachment
- Safety glasses
- Gloves
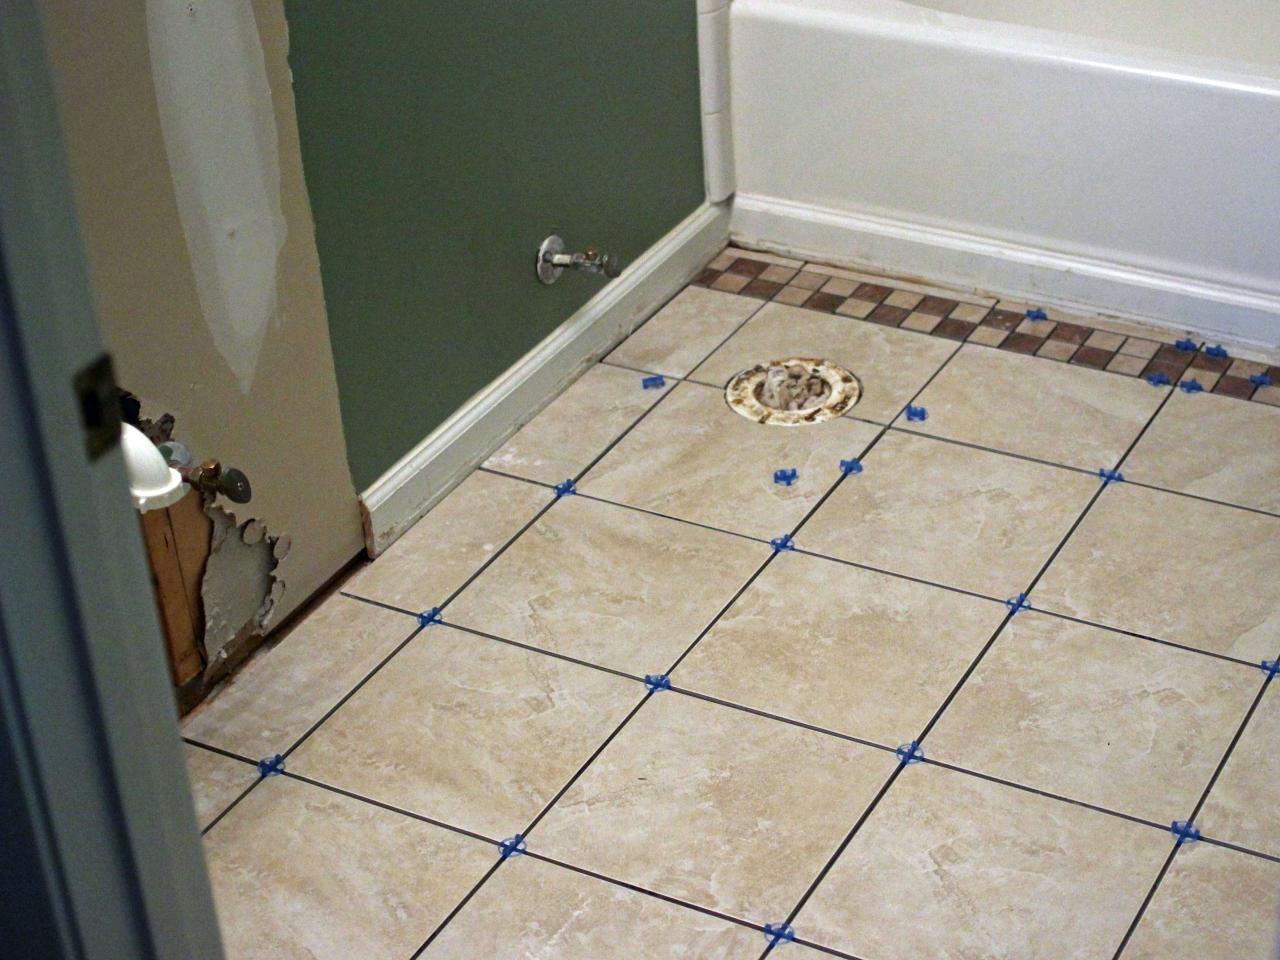
- Spacers
/how-to-install-ceramic-wall-tile-1824817-hero-7225f2fef8ec4499b25825c5d56a0cf3.jpg)
C. Preparing the Substrate:
- Clean the Surface: Remove all debris, dirt, and old flooring materials from the subfloor or walls.
- Inspect for Damage: Check for any signs of water damage, mold, or rot. Repair any damaged areas before proceeding.
- Install Cement Board: Cut the cement board to size and attach it to the subfloor or wall studs using screws designed for cement board. Ensure the cement board is level and securely fastened.
- Apply Waterproofing Membrane: Apply a waterproofing membrane to the cement board, following the manufacturer’s instructions. Pay special attention to seams and corners.
II. Tile Installation: Laying the Foundation for Your Dream Bathroom
A. Planning the Layout:
- Find the Center: Locate the center of the room or wall and mark it with a pencil.
- Dry Layout: Lay out the tiles without mortar to determine the best layout and minimize cuts. Adjust the starting point as needed to avoid small slivers of tile along the edges.
- Mark Cut Lines: Mark the cut lines on the tiles using a pencil or tile scribe.
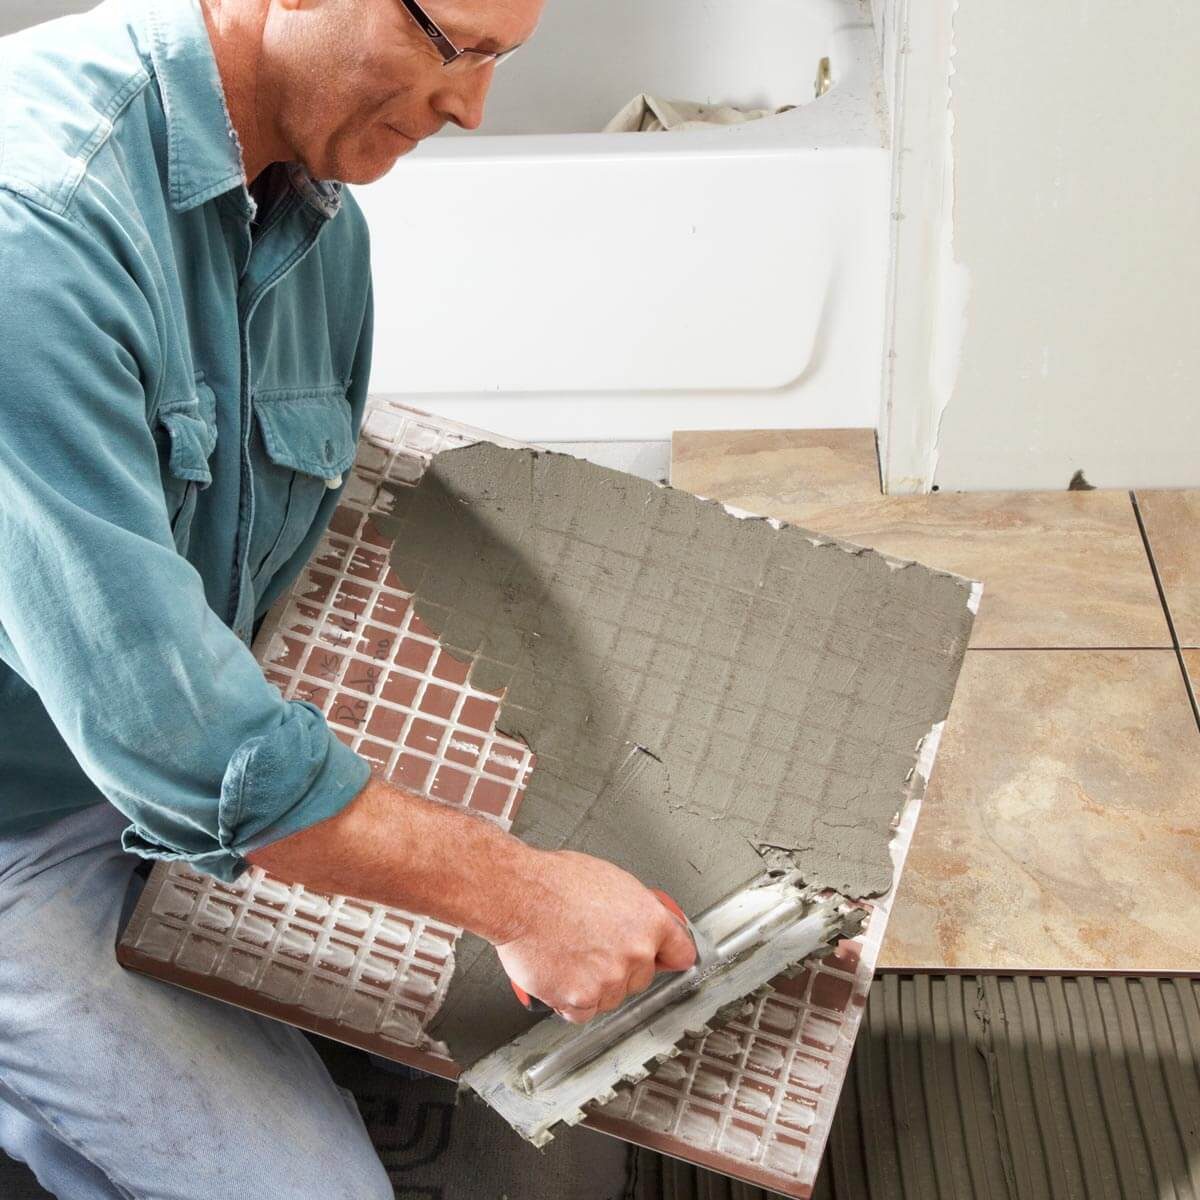
B. Applying the Mortar:
- Mix the Mortar: Mix the mortar according to the manufacturer’s instructions. Use a mixing drill with a paddle attachment to ensure a smooth and consistent mixture.
- Apply the Mortar: Using a notched trowel, apply the mortar to a small section of the substrate. Hold the trowel at a 45-degree angle to create ridges in the mortar.
- Set the Tiles: Press the tiles firmly into the mortar, using a slight twisting motion to ensure good contact. Use tile spacers to maintain consistent grout lines.
- Check for Level: Use a level to ensure the tiles are level and aligned. Adjust as needed.
C. Cutting Tiles:
- Wet Saw: Use a wet saw to cut the tiles to the required size and shape.
- Safety Precautions: Wear safety glasses and gloves when using a wet saw.
- Smooth Edges: Smooth the cut edges of the tiles with a tile file or sandpaper.
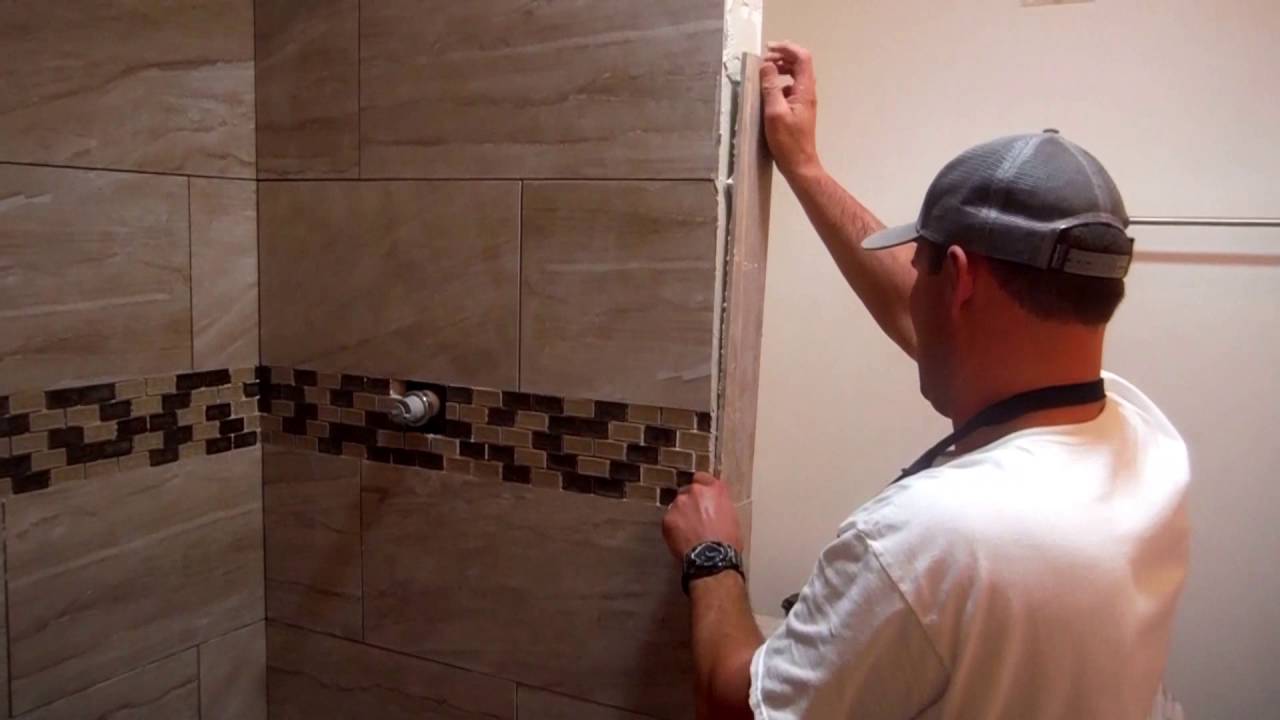
D. Installing Tiles Around the Shower Area:
- Precise Cuts: Make precise cuts to fit the tiles around the shower drain, faucet, and other fixtures.
- Waterproof Seal: Apply a bead of caulk along the seams where the tiles meet the shower pan or walls to create a waterproof seal.
E. Curing Time:
- Allow the Mortar to Cure: Allow the mortar to cure for the recommended time (usually 24-48 hours) before proceeding to the next step.
III. Grouting and Sealing: The Finishing Touches
A. Removing Spacers:
- Remove Tile Spacers: Remove the tile spacers after the mortar has cured.
B. Mixing and Applying Grout:
- Mix the Grout: Mix the grout according to the manufacturer’s instructions.
- Apply the Grout: Using a grout float, apply the grout to the tile surface, pressing it into the grout lines.
- Remove Excess Grout: Remove excess grout with a grout float, holding it at a 45-degree angle.
C. Cleaning and Polishing:
- Clean the Surface: Use a grout sponge to clean the tile surface, rinsing frequently with clean water.
- Polish the Tiles: Polish the tiles with a soft cloth to remove any remaining grout haze.
D. Sealing the Grout:
- Apply Grout Sealer: Apply a grout sealer to the grout lines to protect them from moisture and stains. Follow the manufacturer’s instructions.
IV. Installing the Glass Shower Door:
A. Preparation:
- Measure the Opening: Accurately measure the shower opening to ensure the glass door fits properly.
- Inspect the Frame: Inspect the glass door frame for any damage or defects.
B. Installation:
- Follow Manufacturer’s Instructions: Follow the manufacturer’s instructions for installing the glass shower door.
- Secure the Frame: Secure the frame to the walls using screws or anchors.
- Install the Door: Install the glass door into the frame.
- Adjust Hinges: Adjust the hinges to ensure the door opens and closes smoothly.
C. Sealing:
- Apply Caulk: Apply a bead of caulk along the seams where the frame meets the walls to create a waterproof seal.
V. Final Touches and Maintenance:
A. Cleaning:
- Clean the Tiles: Clean the tiles with a mild detergent and water.
- Clean the Glass Door: Clean the glass door with a glass cleaner.
B. Maintenance:
- Regular Cleaning: Clean the tiles and grout regularly to prevent stains and mildew.
- Re-sealing: Re-seal the grout every 1-2 years to maintain its waterproof properties.
- Inspect for Damage: Inspect the tiles and grout for any signs of damage or wear. Repair any damaged areas promptly.
VI. 2025 Design Trends: Enhancing the Traditional Bathroom
A. Smart Technology Integration: Incorporate smart technology into your bathroom design, such as smart mirrors with built-in lighting and anti-fog features, smart shower systems with customizable settings, and voice-activated controls for lighting and temperature.
B. Sustainable Materials: Opt for eco-friendly materials, such as recycled glass tiles, bamboo vanities, and low-flow toilets and showerheads.
C. Biophilic Design: Bring the outdoors in by incorporating natural elements into your bathroom design, such as plants, natural stone accents, and ample natural light.
D. Personalized Touches: Add personalized touches to your bathroom to make it your own. Display your favorite artwork, add cozy textiles, and incorporate unique accessories that reflect your personal style.
Conclusion:
Installing porcelain tile in a traditional bathroom with a glass shower door is a rewarding project that can transform your space into a luxurious and functional retreat. By following these steps and incorporating 2025 design trends, you can create a bathroom that is both timeless and contemporary. With careful planning, attention to detail, and the right materials and tools, you can achieve a professional-looking result that will enhance the value and enjoyment of your home.
Komentar
Posting Komentar